Getting Started
Start by creating a trip for the journey you want to record.
Select that trip as your active trip before adding fuel, expenses, notes, photos, or planning details.
Tripometer saves new records to the active trip, so everything stays grouped with the right journey.
You can switch the active trip when you move between holidays, work travel, or everyday vehicle records.
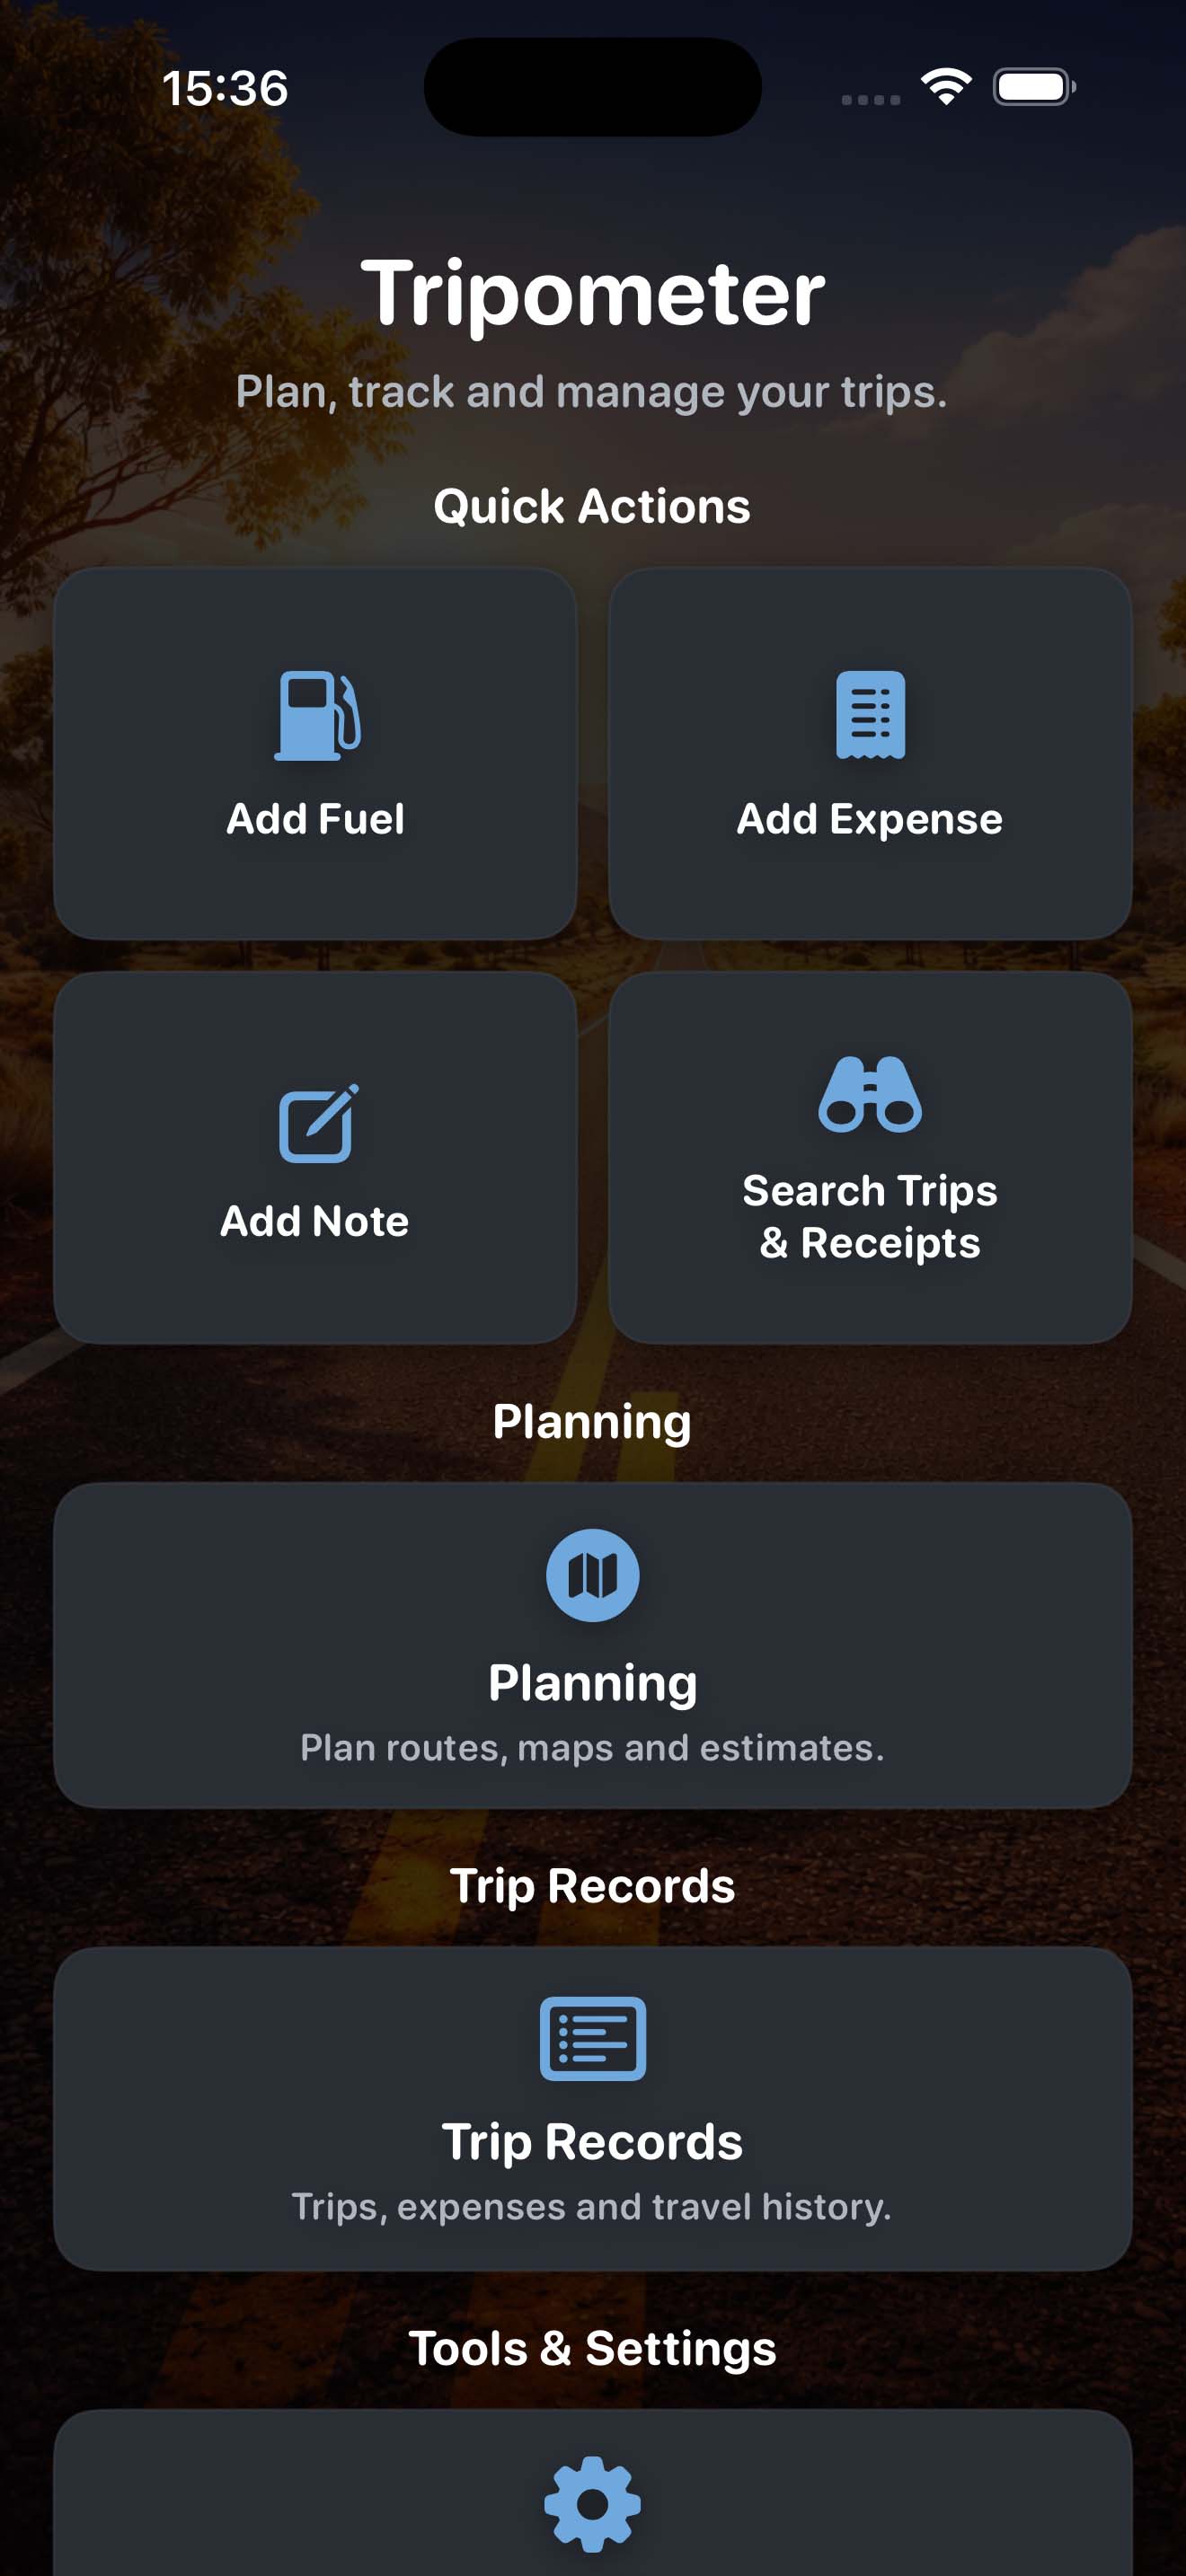
Main Menu
The main menu is the starting point for Tripometer.
Use it to open trip planning, maps, weather, fuel prices, fuel entries, expenses, notes, summaries, backups, and sharing tools.
The sections work together through your active trip. Planning helps you prepare, tracking records what happens on the road, and summaries show the full result.
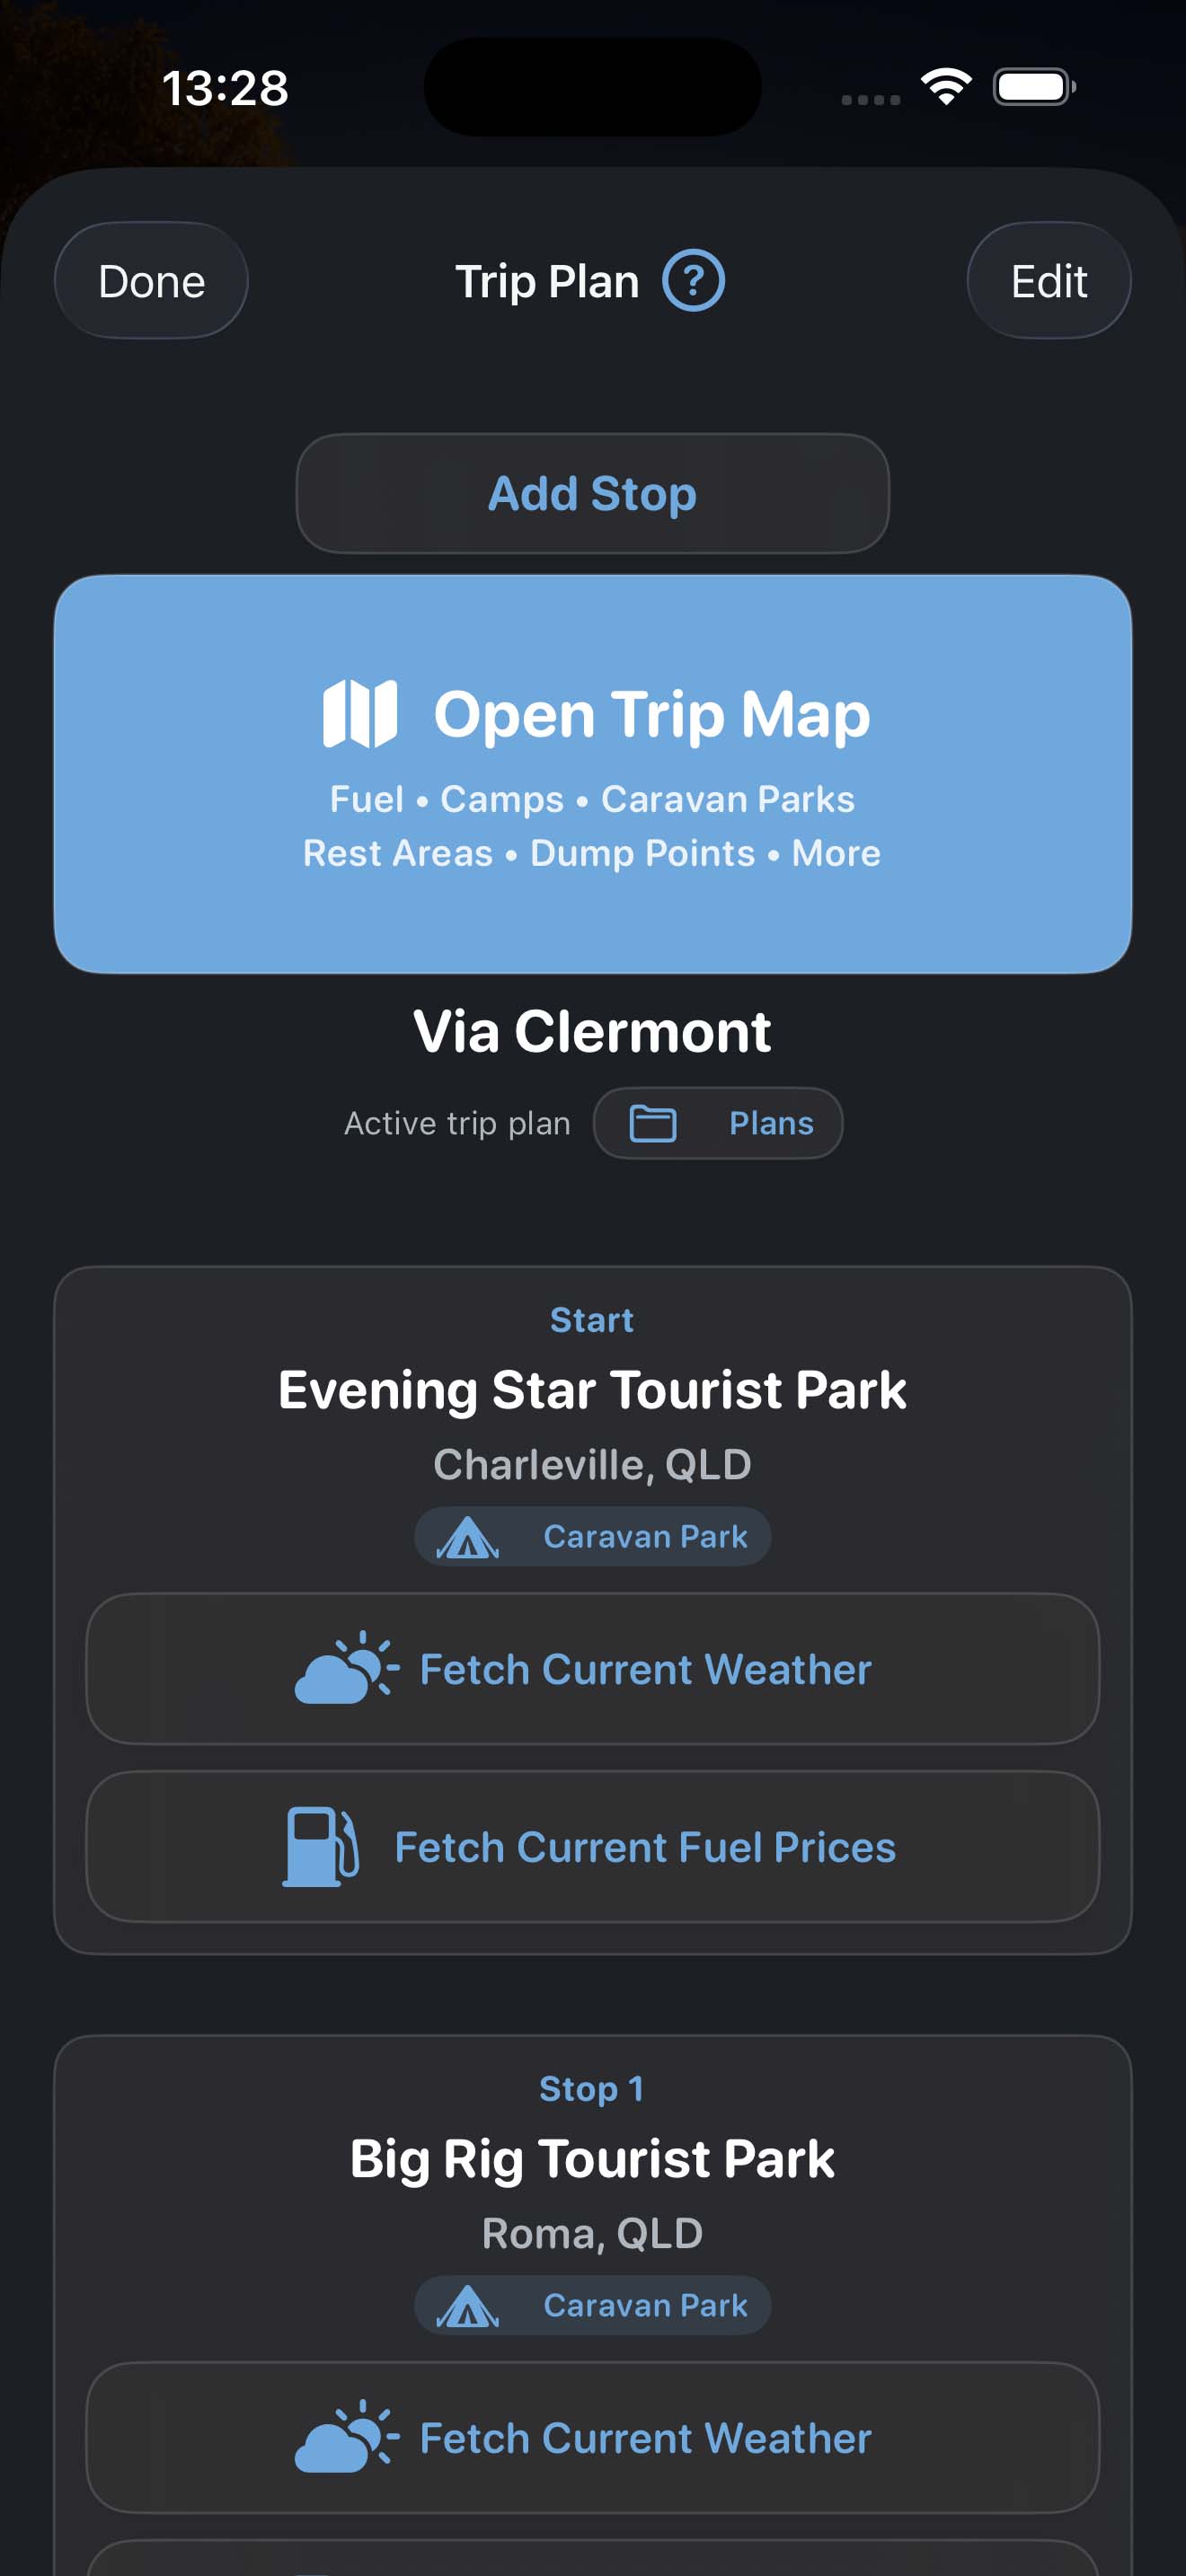
Trip Planner
Enter a starting point and destination, then add any stops you want to include along the way.
Calculate the route to estimate distance, travel planning details, and likely fuel costs based on your vehicle information.
Save useful plans to your trip so you can come back to them later instead of entering the same route again.
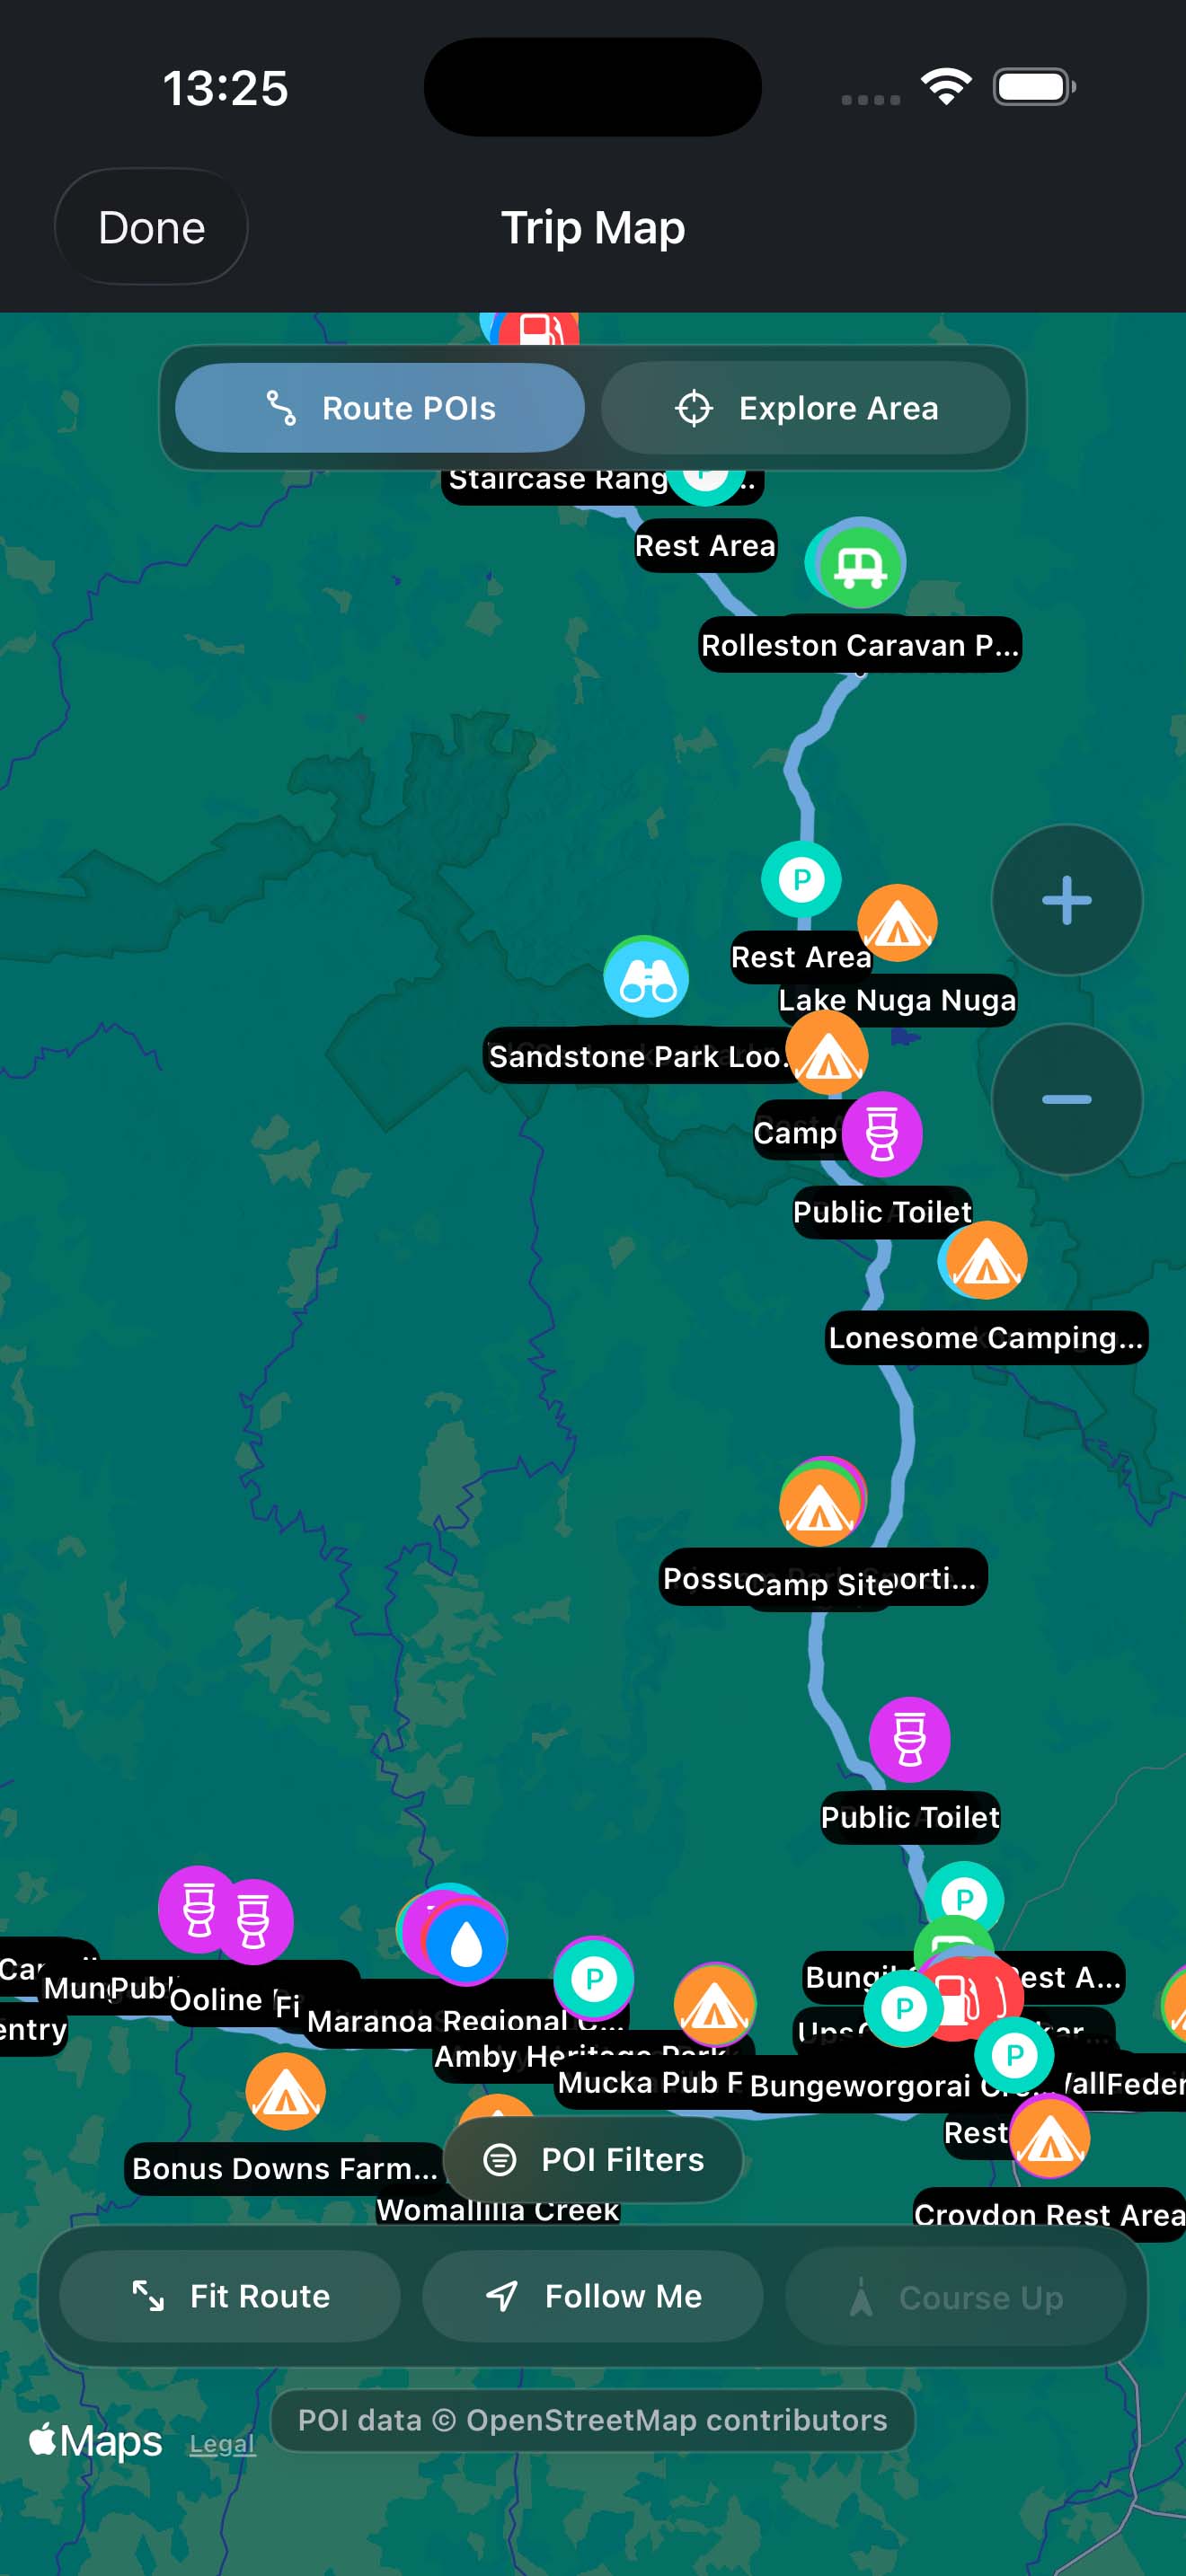
Trip Map
Use the map to see your route, stops, and trip information in context.
Open places from the map when you want more detail, then use the available navigation options to continue planning or start driving.
The map is useful for checking how your stops fit together before you commit to the next leg.
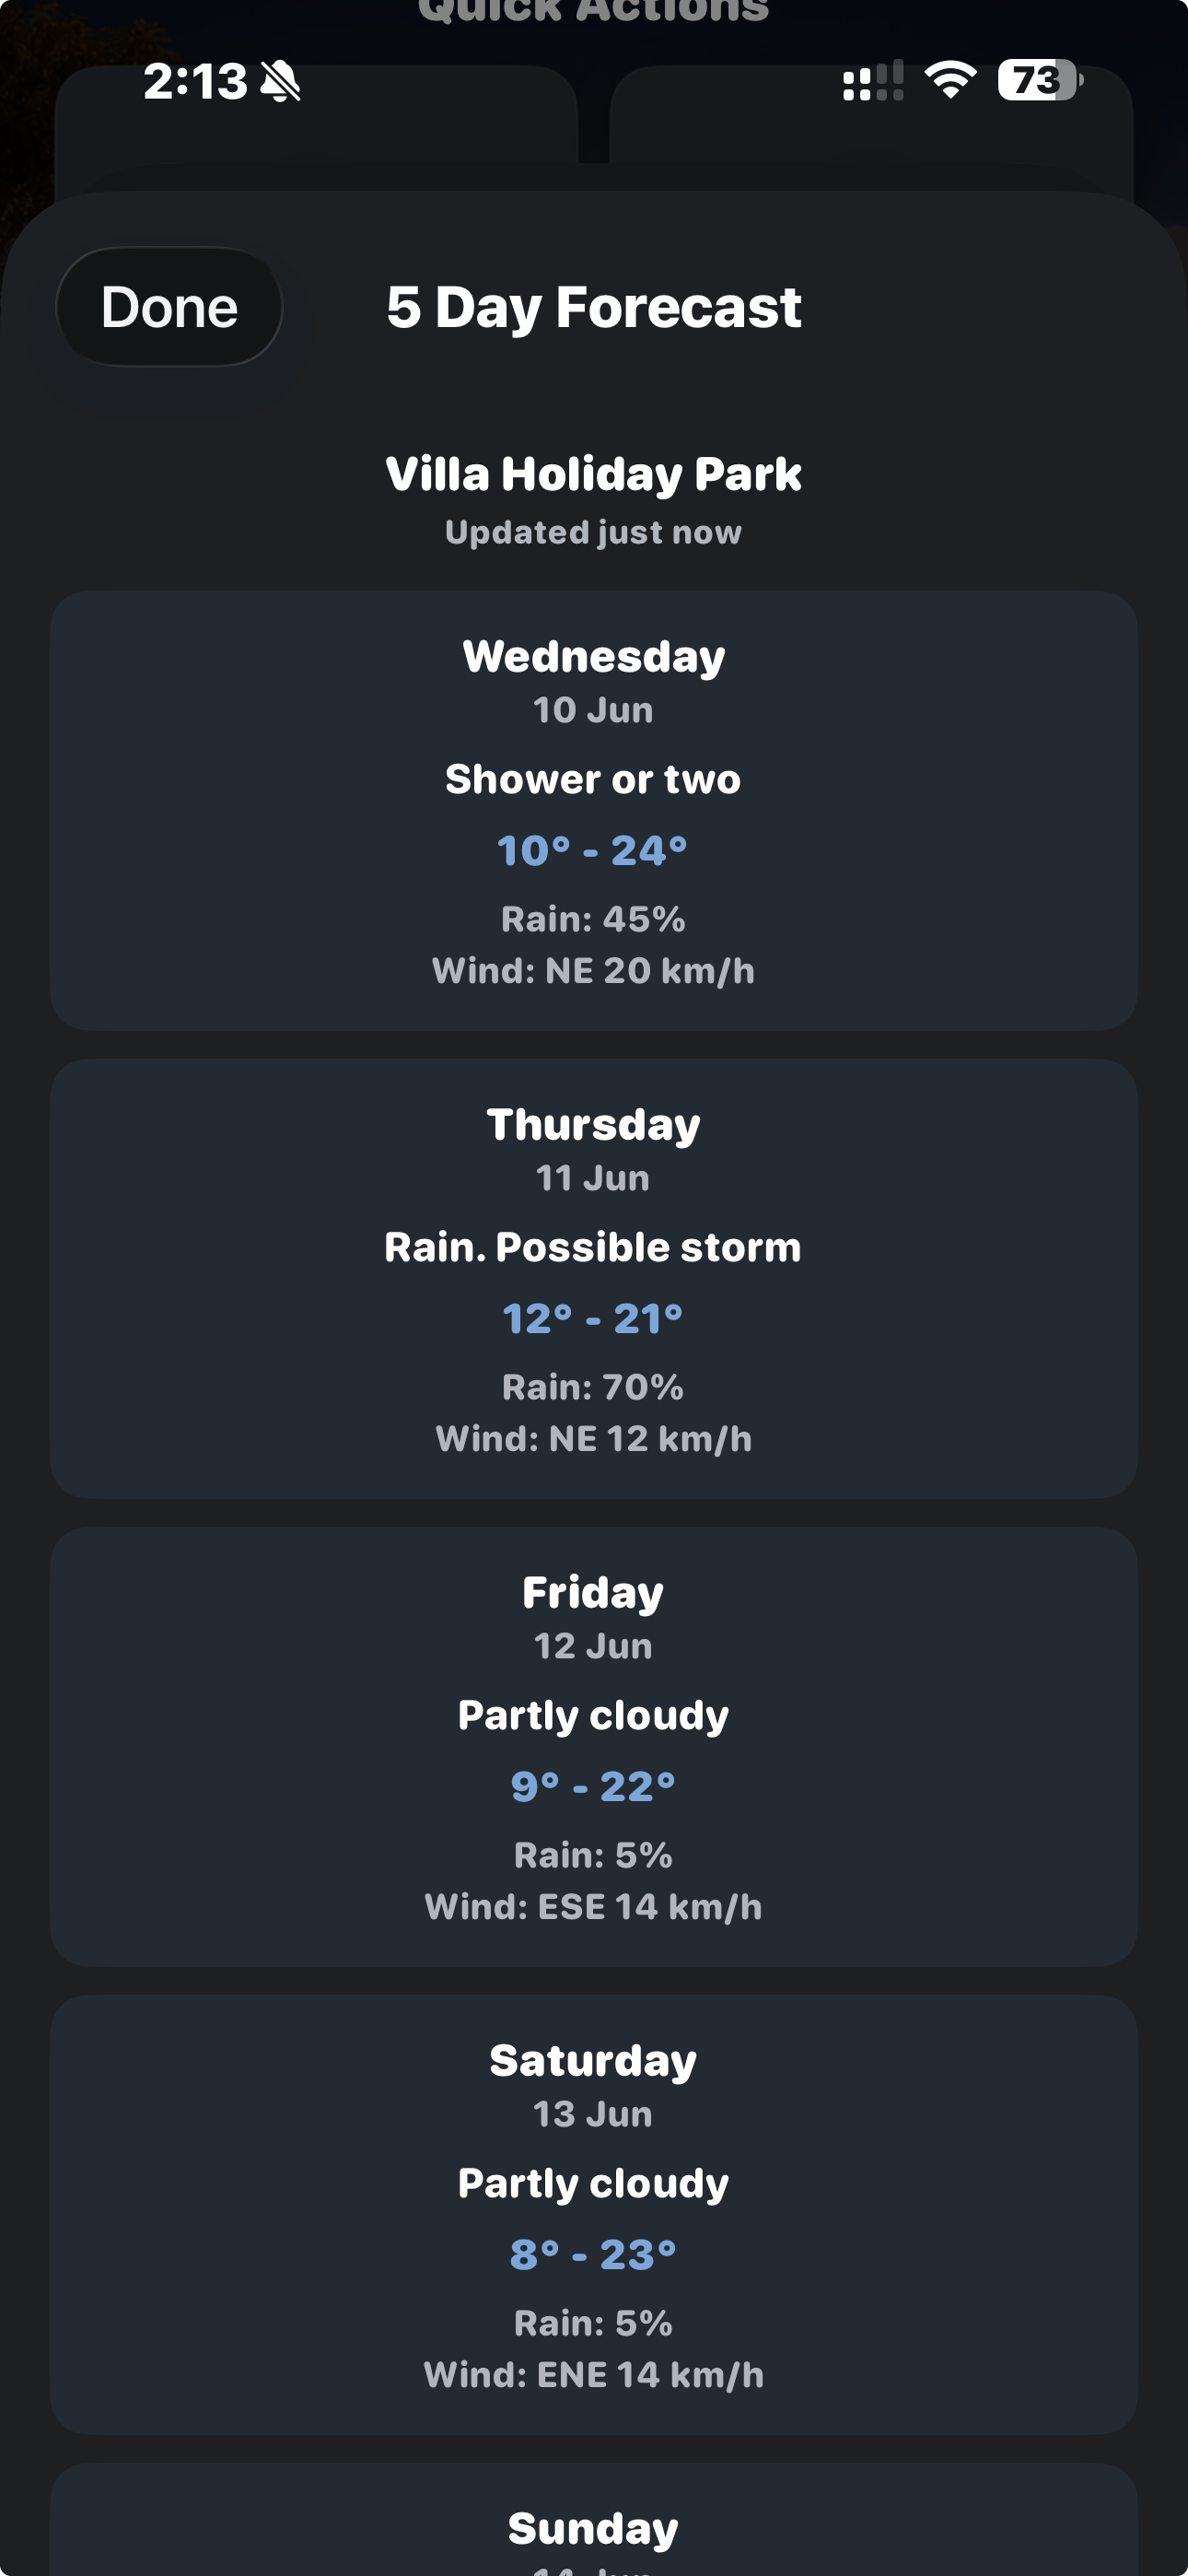
Weather Forecasts
Check weather forecasts while planning where to go next.
Forecasts can help you decide when to travel, whether to stay another night, or whether to adjust your route for safer or more comfortable conditions.
Use the forecast as a guide alongside local advice and road conditions.
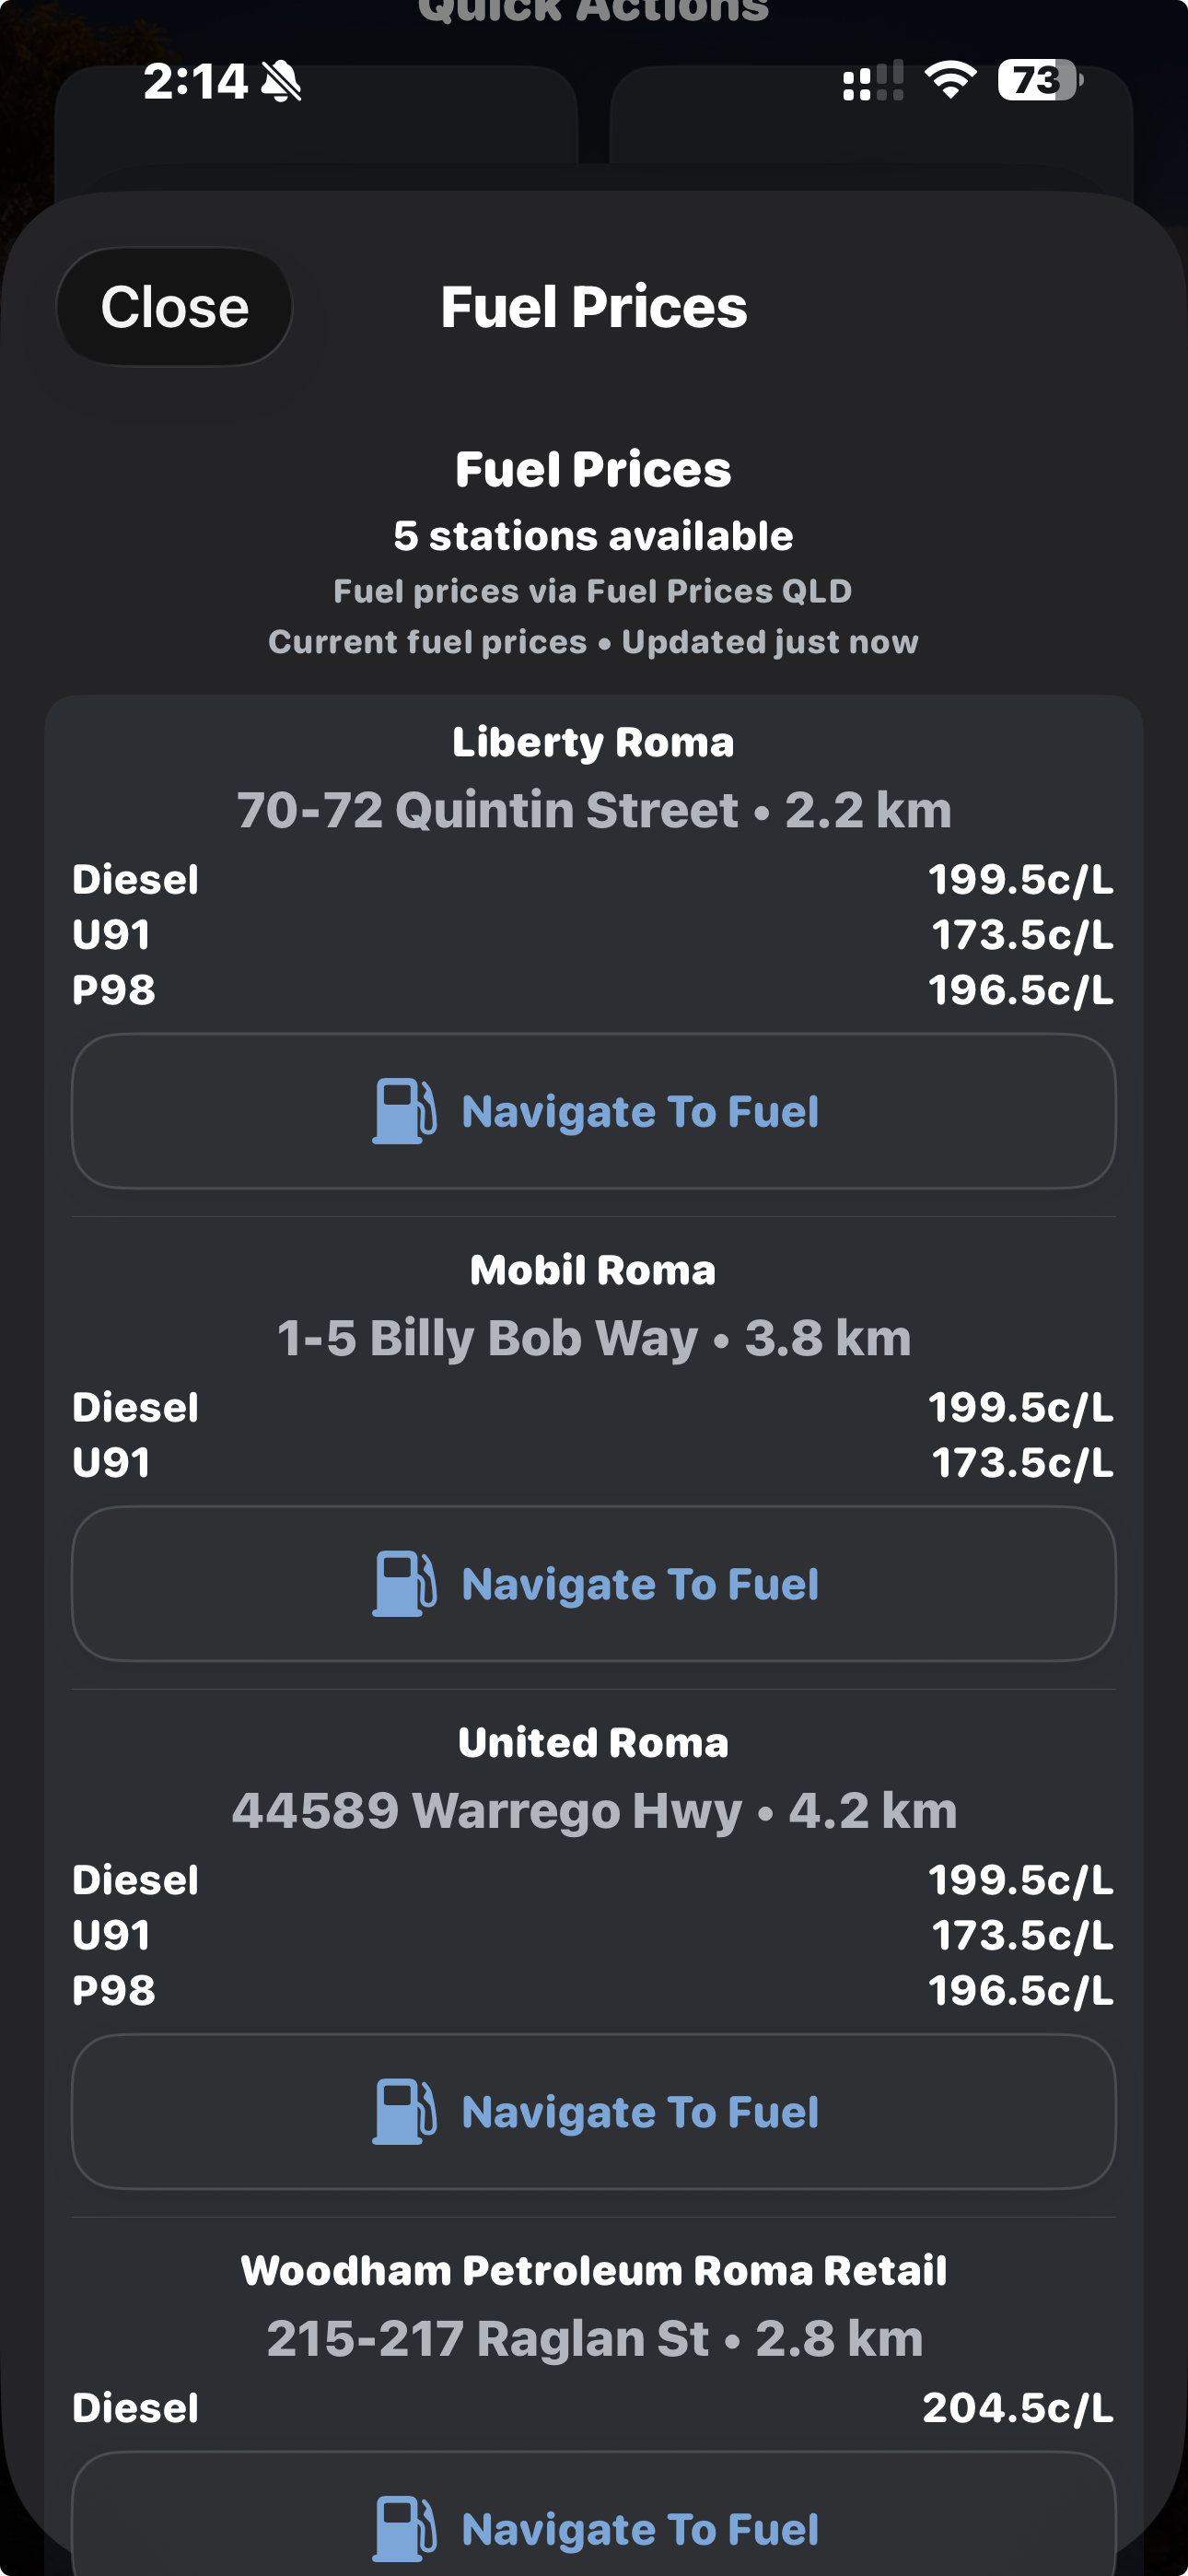
Fuel Prices
View available fuel price information when planning stops or comparing nearby options.
Fuel prices can help you decide where to fill up, especially on longer drives where towns may be far apart.
Prices can change, so treat them as helpful travel information rather than a guarantee.
Australian Traveller Points of Interest
Tripometer includes traveller-focused places that can help when planning or exploring.
Use points of interest to find caravan parks, free camps, dump points, rest areas, fuel stops, attractions, historical locations, mining locations, and other useful places.
POIs are most helpful when you are working out where to stop, where to refuel, or what is nearby before moving on.
Explore Area
Use Explore Area to look around a location before or during a stop.
It can help you find nearby traveller facilities, attractions, services, and places worth checking before you arrive.
This is useful when you have reached a town, chosen a camp, or want to see what is close to your planned route.
Navigation
Open locations in Apple Maps when you are ready to navigate.
You can use navigation from planned trips, map locations, and points of interest, depending on where you are working in the app.
Tripometer helps you organise the trip, while Apple Maps handles turn-by-turn directions.
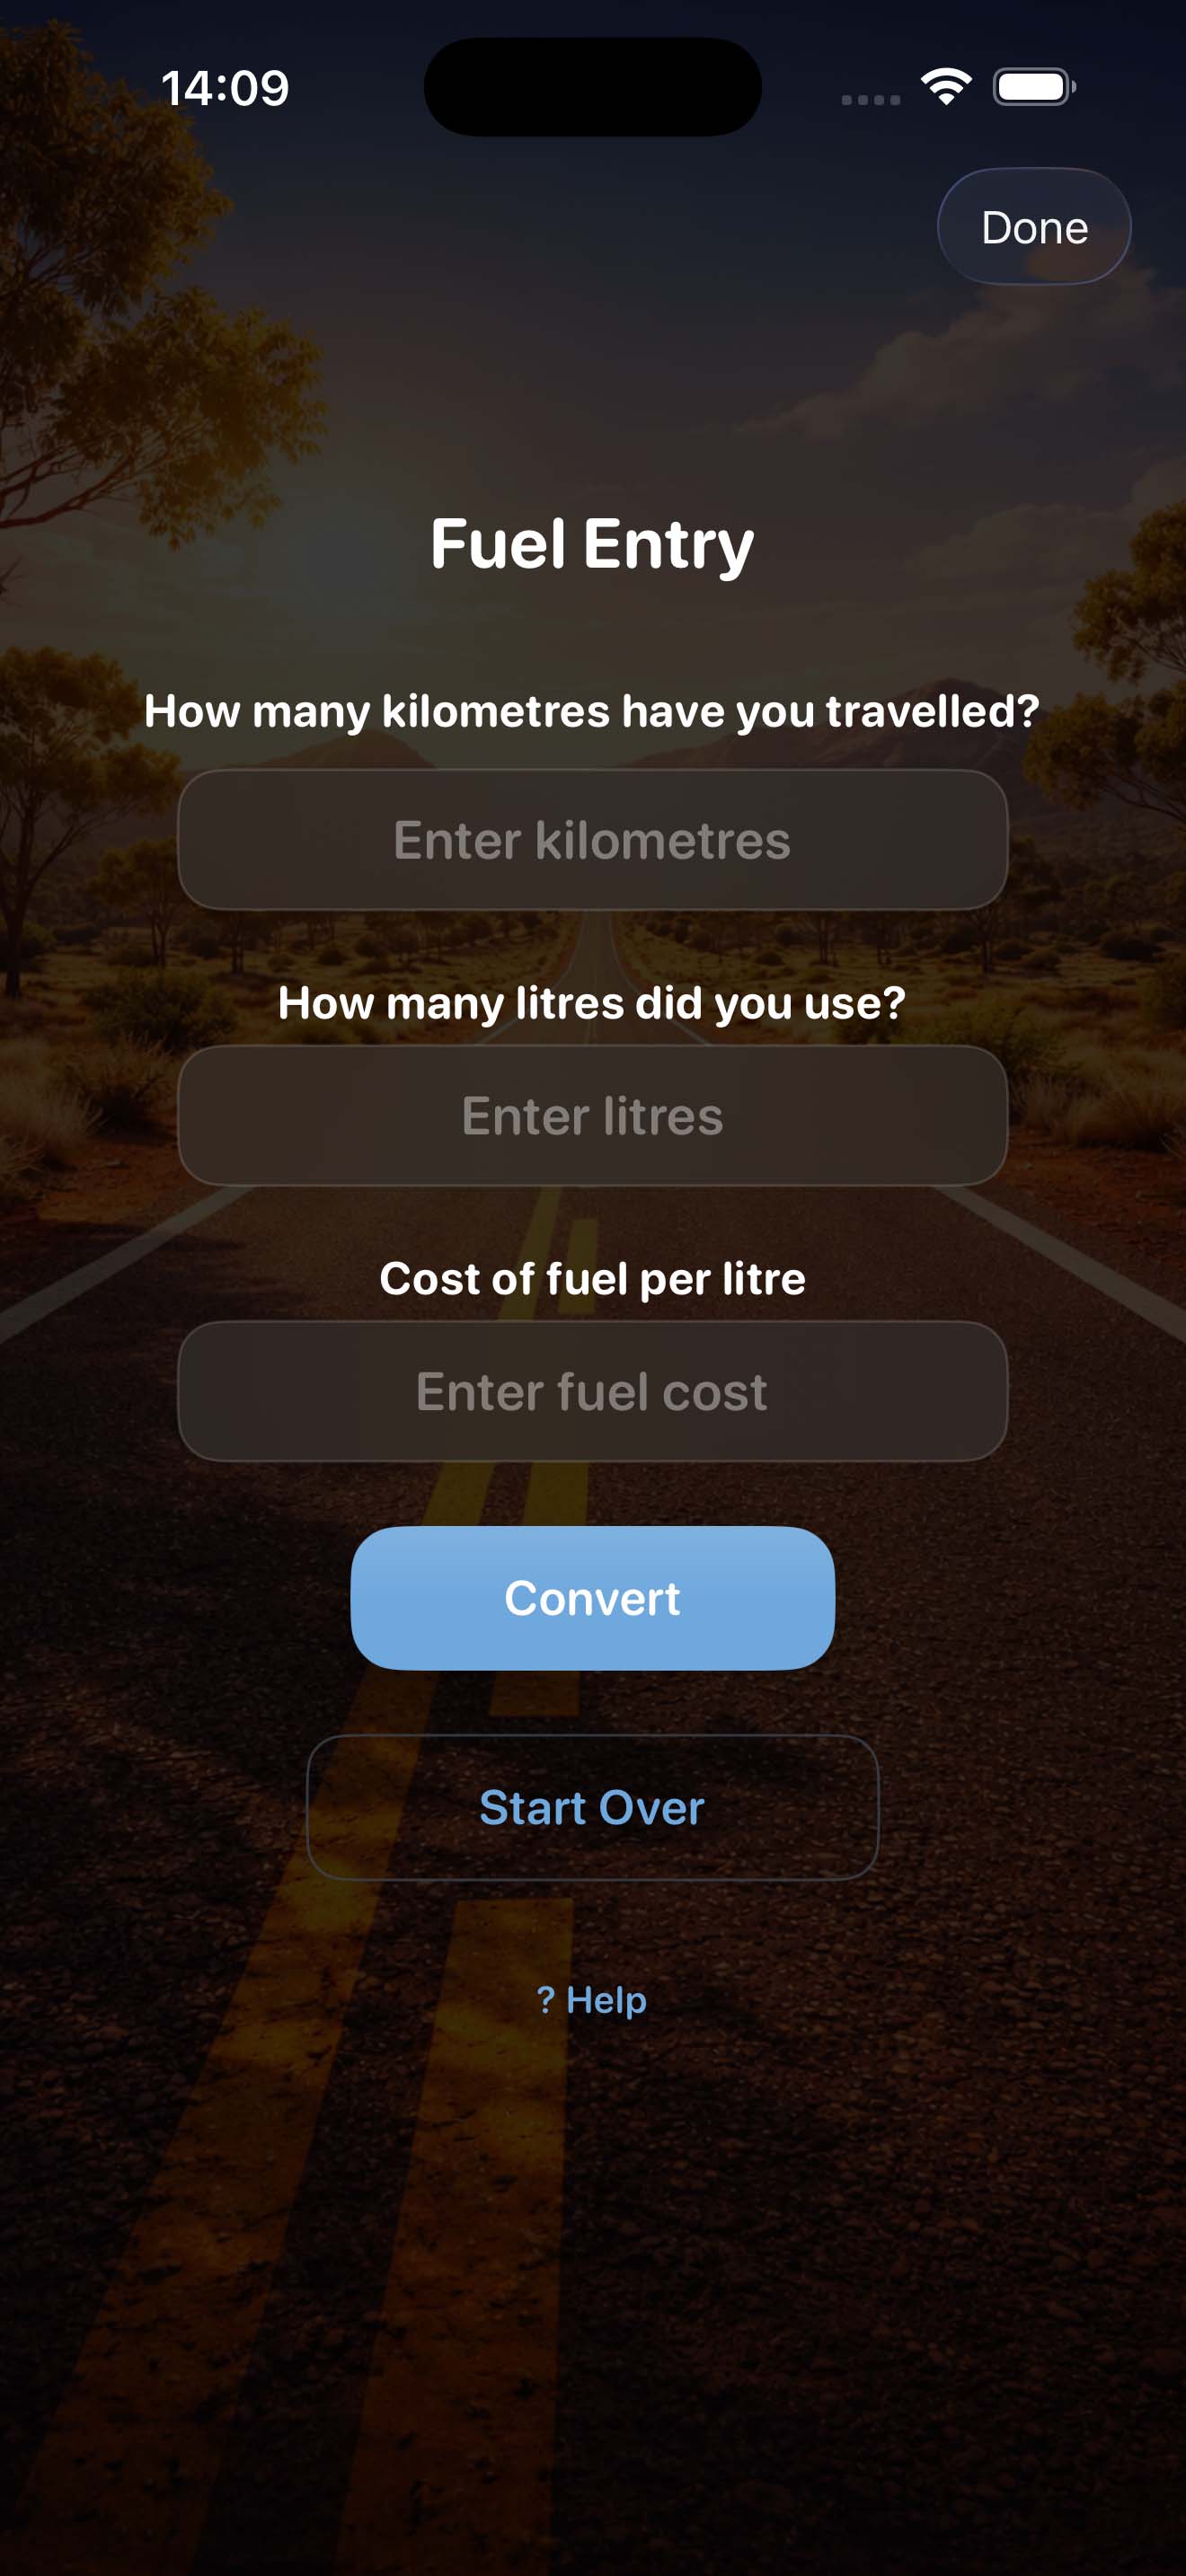
Fuel Tracking
Record fuel fills as you travel so you can see how much fuel the trip is using.
For the most accurate fuel economy, use the full tank method: start with a full tank, drive as normal, then record the distance travelled, litres added, and price at the next fill.
Tripometer uses those entries to calculate fuel economy, fuel use, and fuel costs for the active trip.
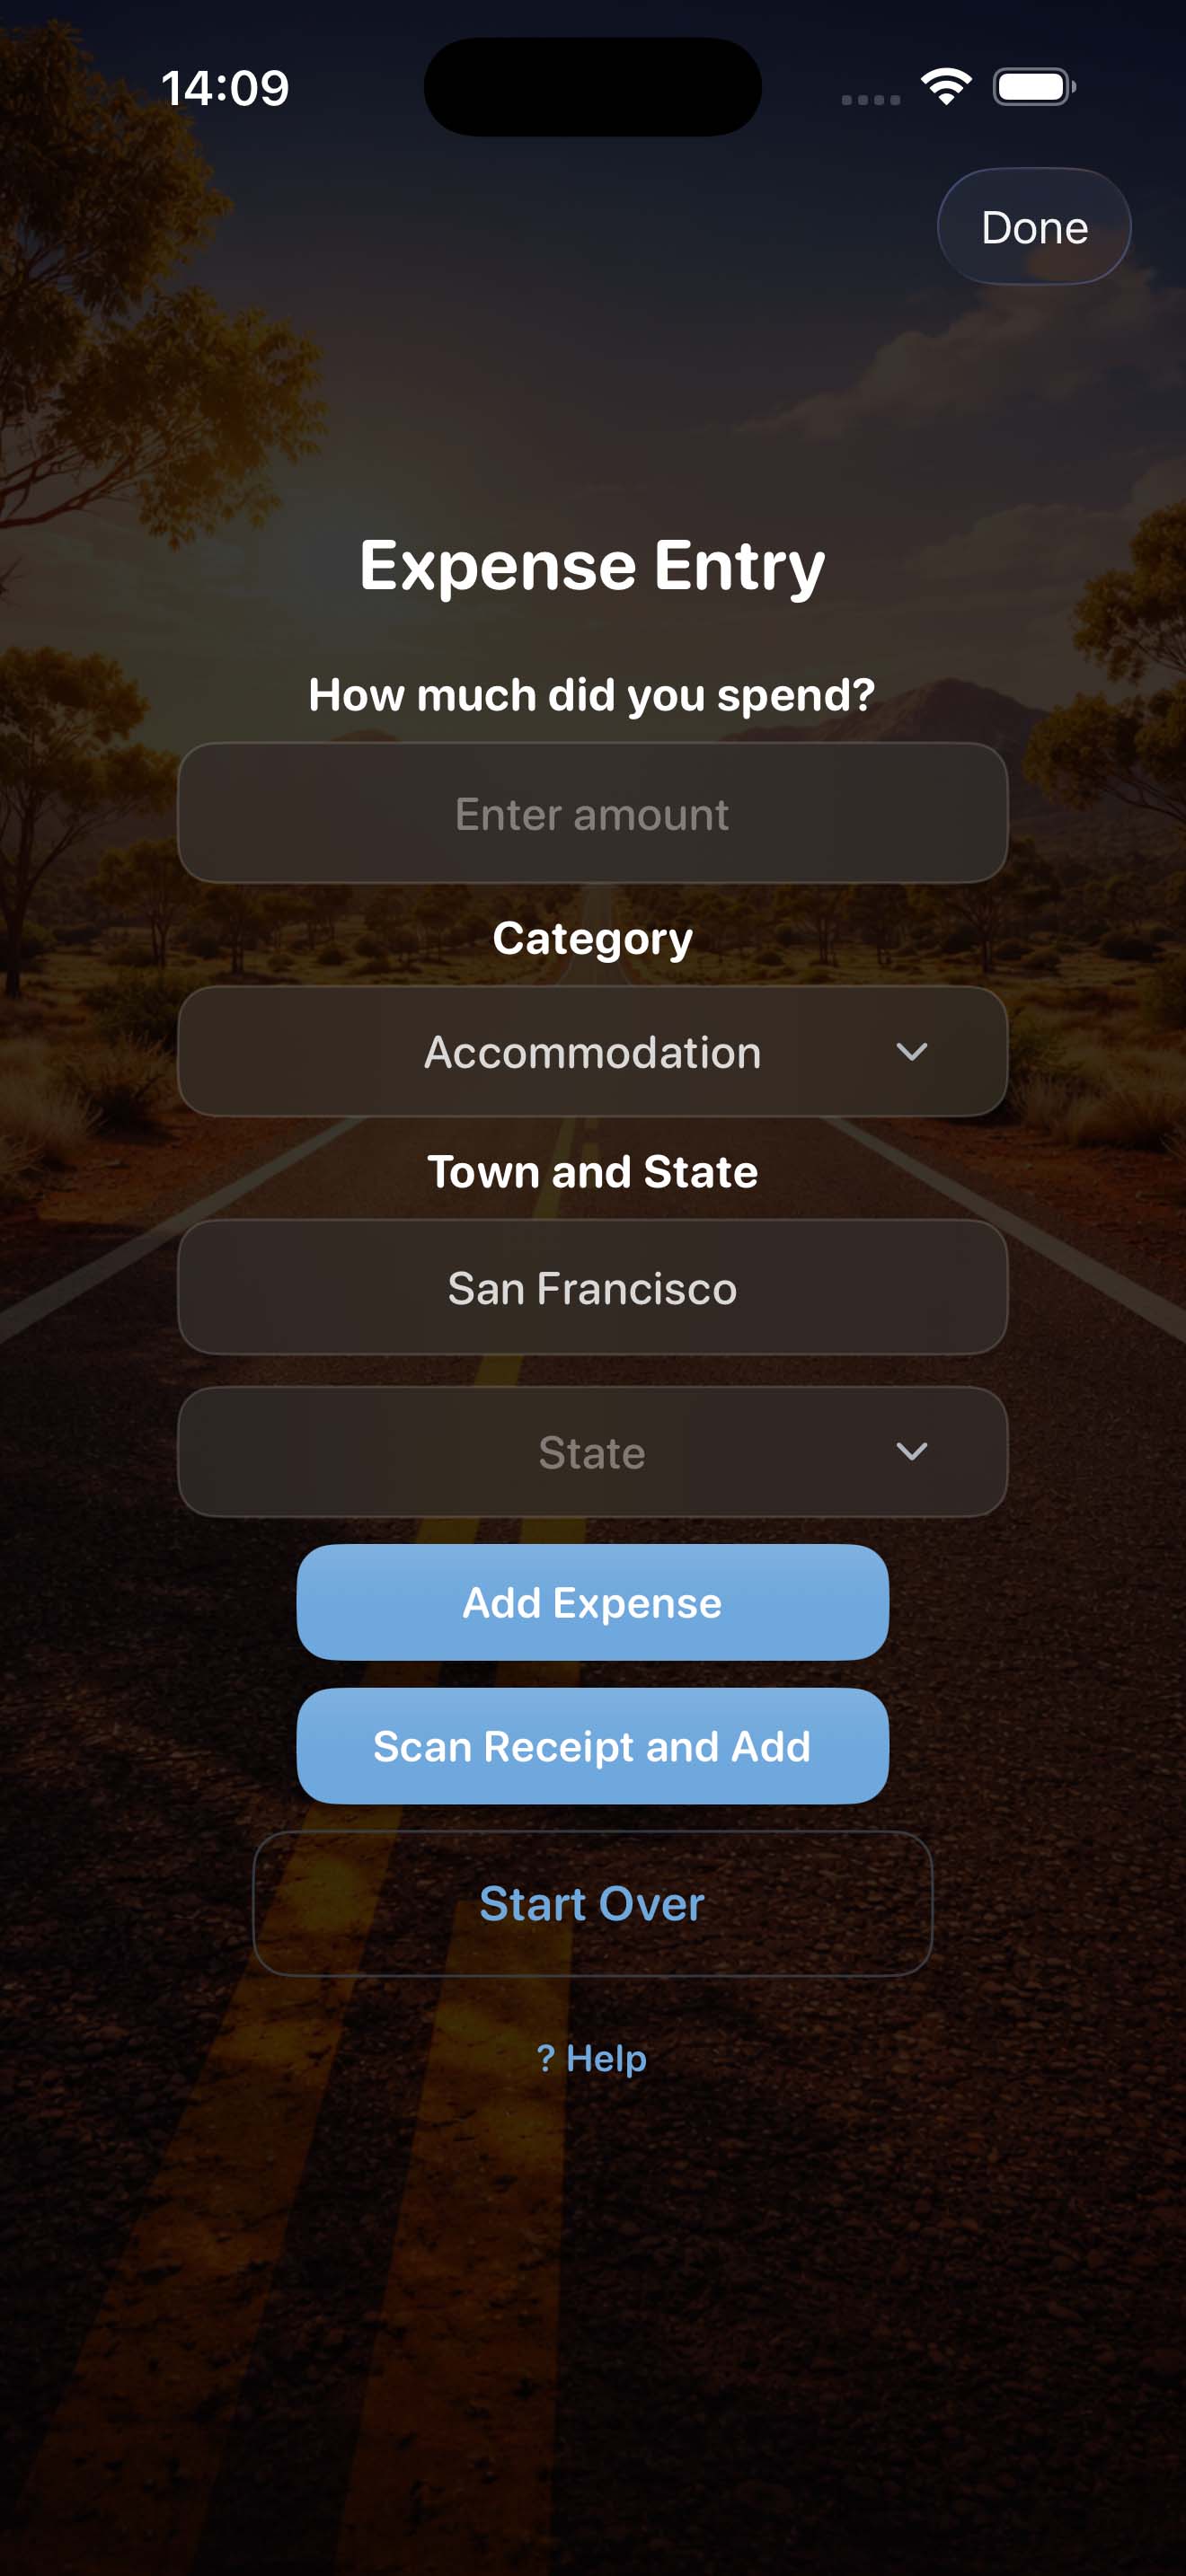
Expense Tracking
Record trip expenses such as accommodation, food, repairs, park fees, supplies, and other travel costs.
Choose a category and location so your spending is easier to understand later.
Regular expense entries make it easier to keep an eye on your budget while you are still travelling.
Receipt Scanning
Attach receipts to expense records so the proof of purchase stays with the trip.
Use receipt reading to help capture details from a receipt without manually typing everything.
This is useful for work travel, tax records, warranty claims, repairs, and keeping trip paperwork in one place.
Notes and Photos
Add notes and photos to record the parts of a trip that are not just numbers.
Use them for camp details, road conditions, repairs, places you liked, location reminders, or general travel memories.
Keeping notes and photos with the trip makes them easier to find later.
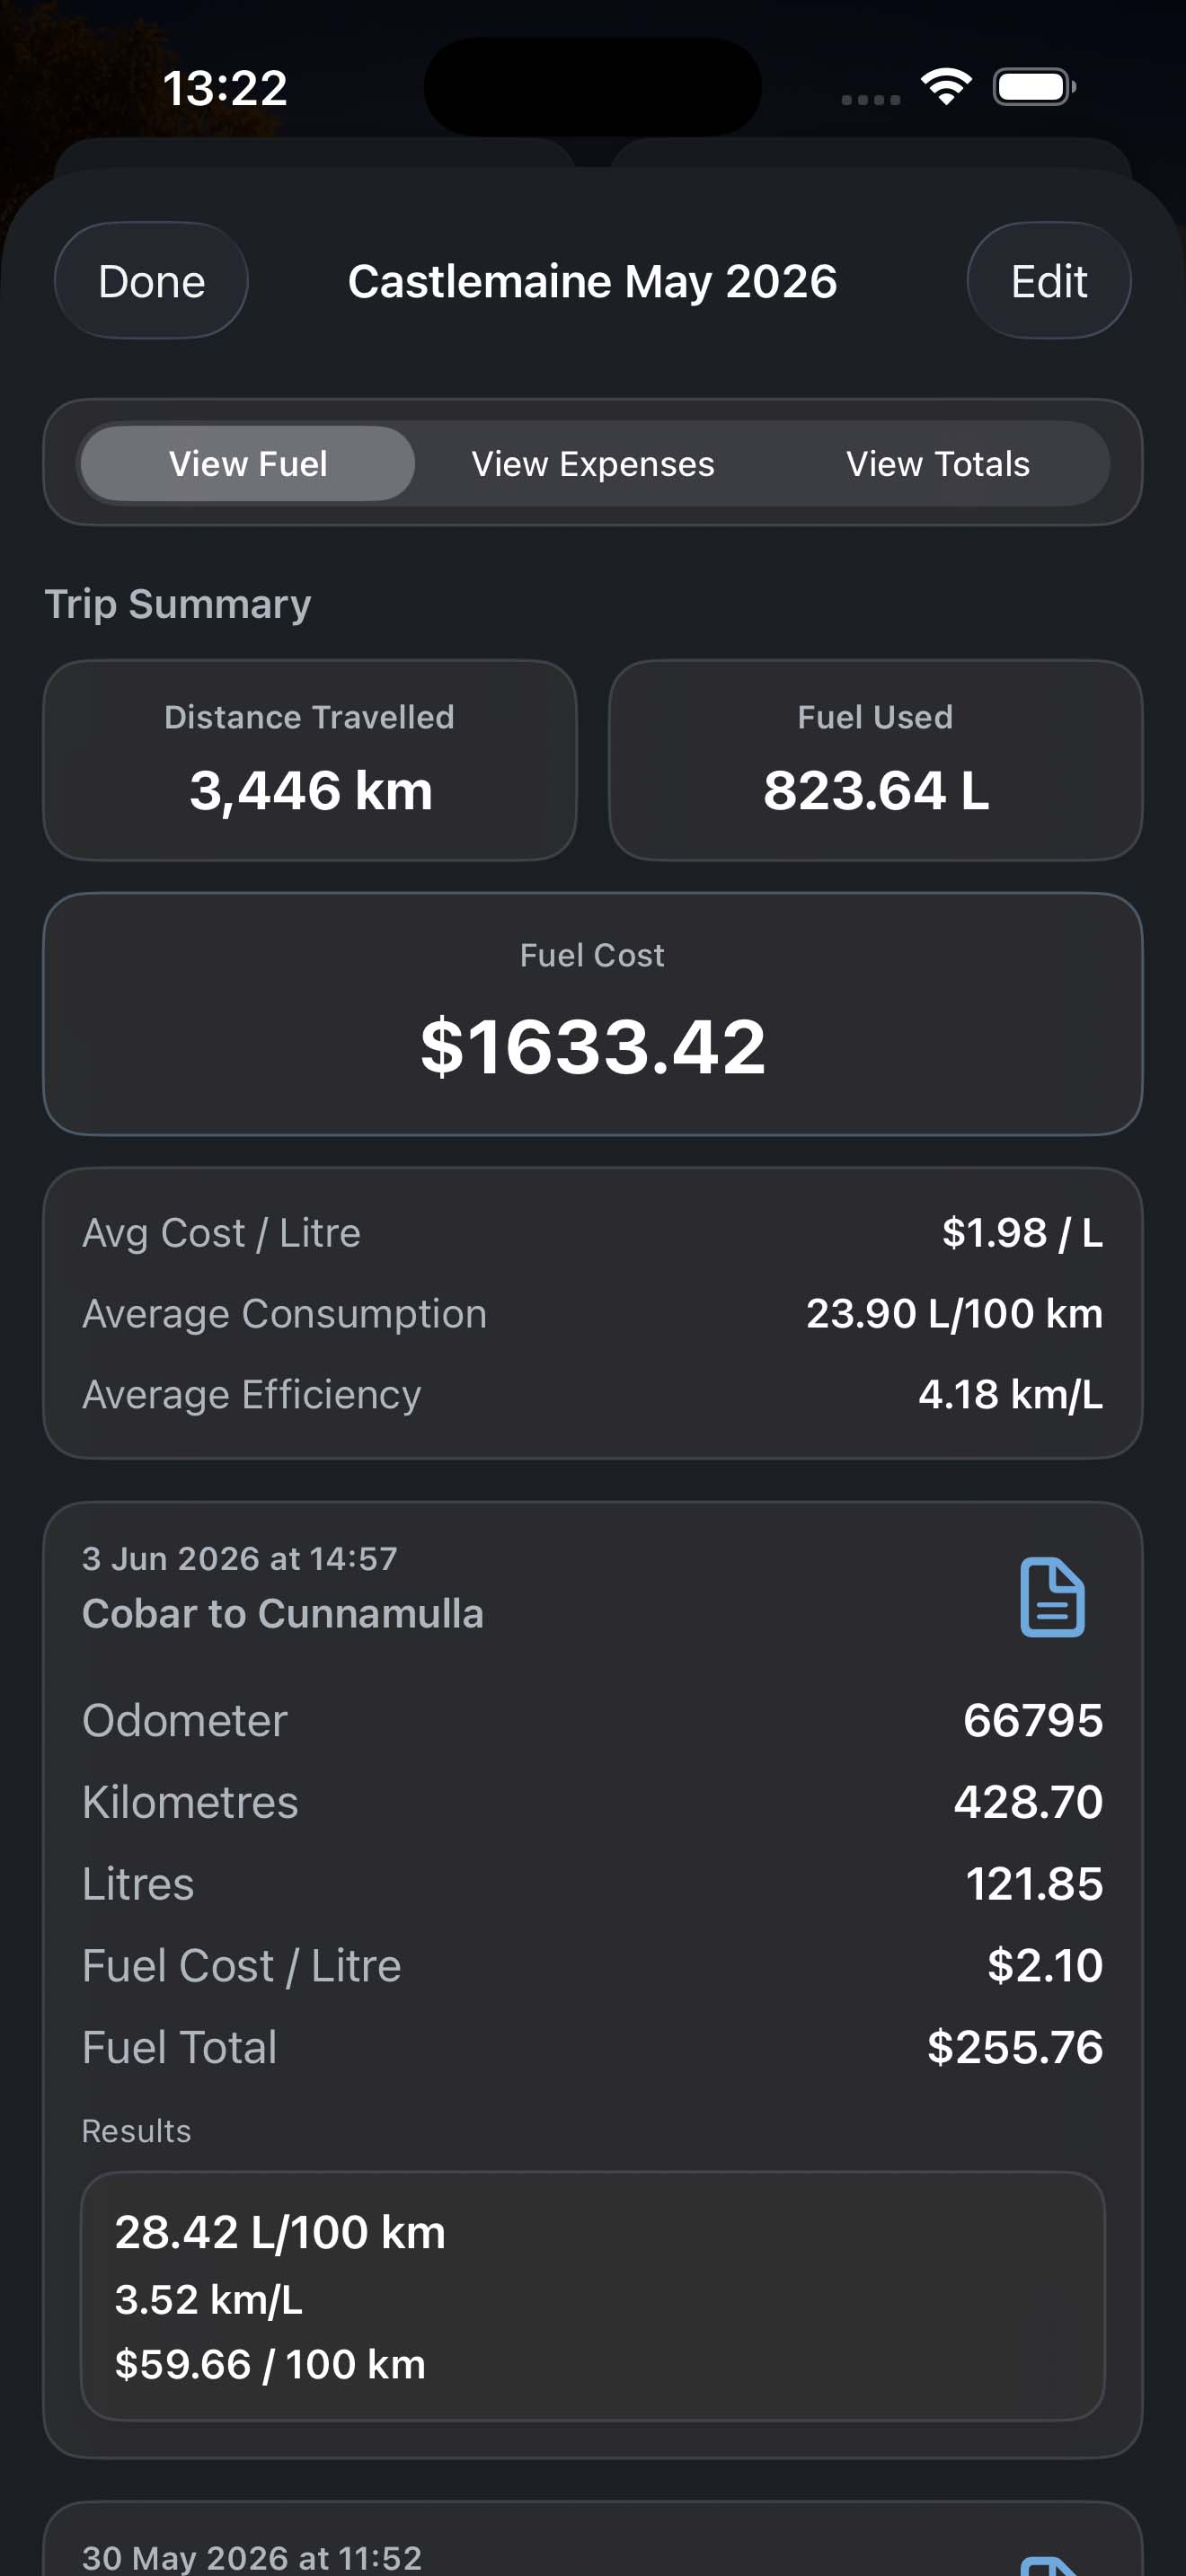
Fuel Summary
Use the fuel summary to review your fuel history for the selected trip.
It helps you see fuel fills, total fuel used, fuel economy, and the cost of fuel over time.
This is useful for comparing driving conditions, towing, different routes, or changes in vehicle load.
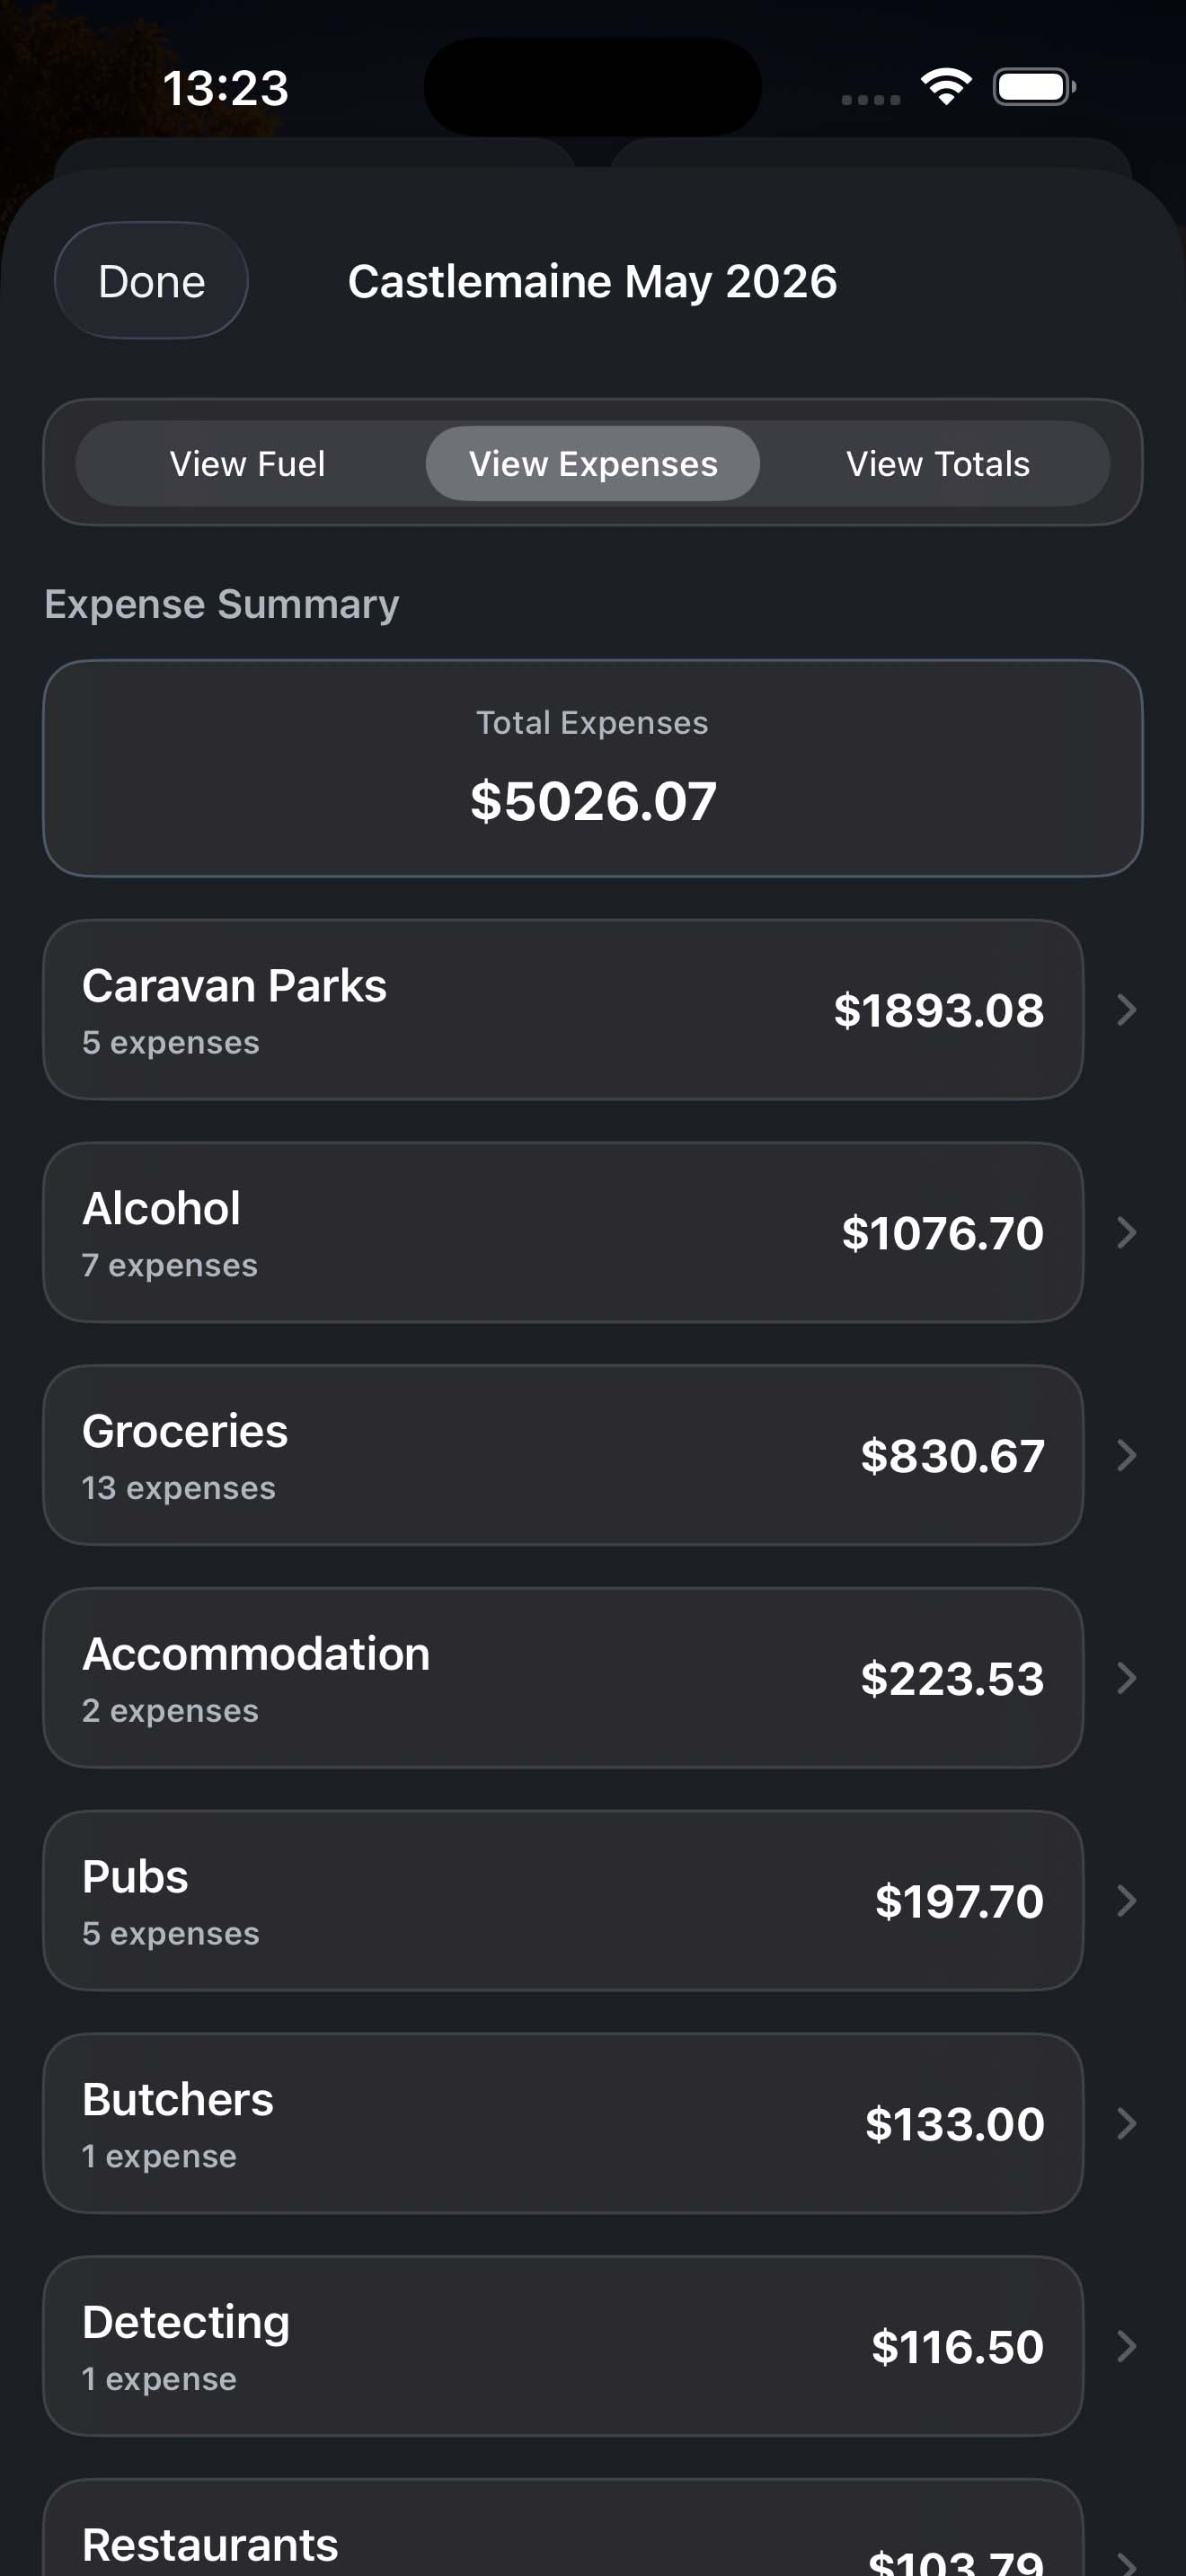
Expense Summary
Use the expense summary to review spending for the selected trip.
Expenses are easier to understand when grouped by category, location, and total cost.
This helps you see where the money went and whether your travel budget is still on track.
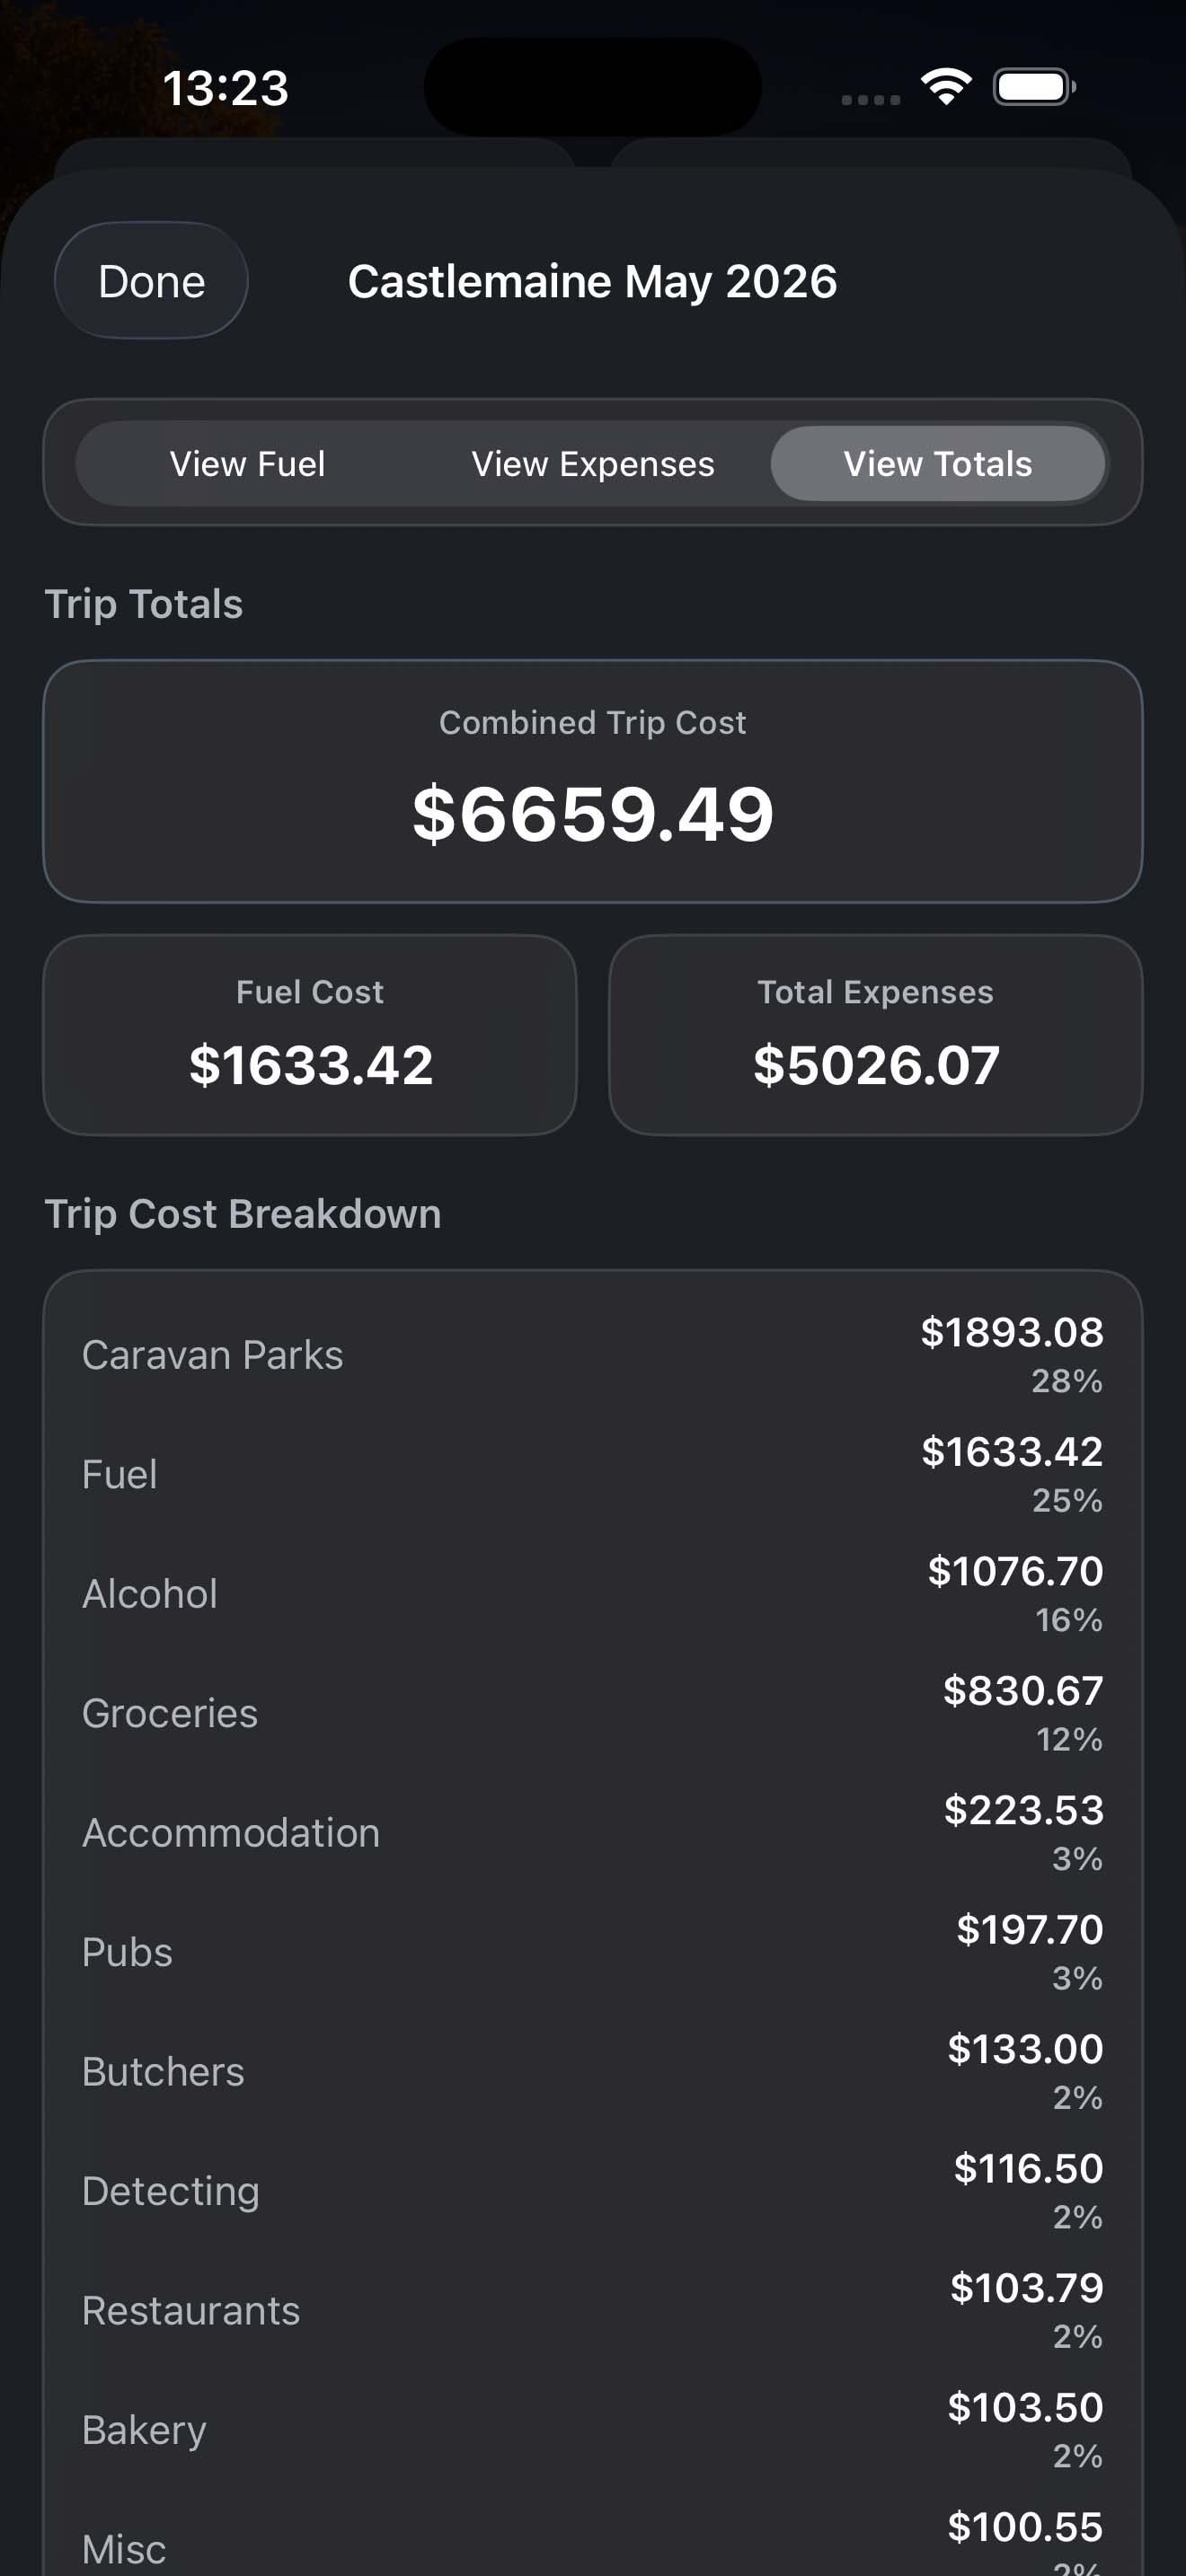
Trip Summary
The trip summary brings your main trip totals together in one place.
Use it to review fuel costs, expenses, totals, averages, and overall trip records.
It is a useful check at the end of a trip, or any time you want to know how the journey is tracking.
Backups and Restore
Back up your Tripometer data regularly, especially before changing phones, updating devices, or making major changes to your trips.
A backup helps protect your trips, fuel entries, expenses, receipts, notes, photos, and saved travel records.
When restoring, choose the backup you want to use and check that it is the right one before replacing current data.
Sharing and Exporting
Share trip data when you need records outside the app.
You can save reports, send trip information to someone else, or export records for your own files.
This is useful for travel records, work claims, budgeting, tax preparation, or keeping a copy with other trip documents.
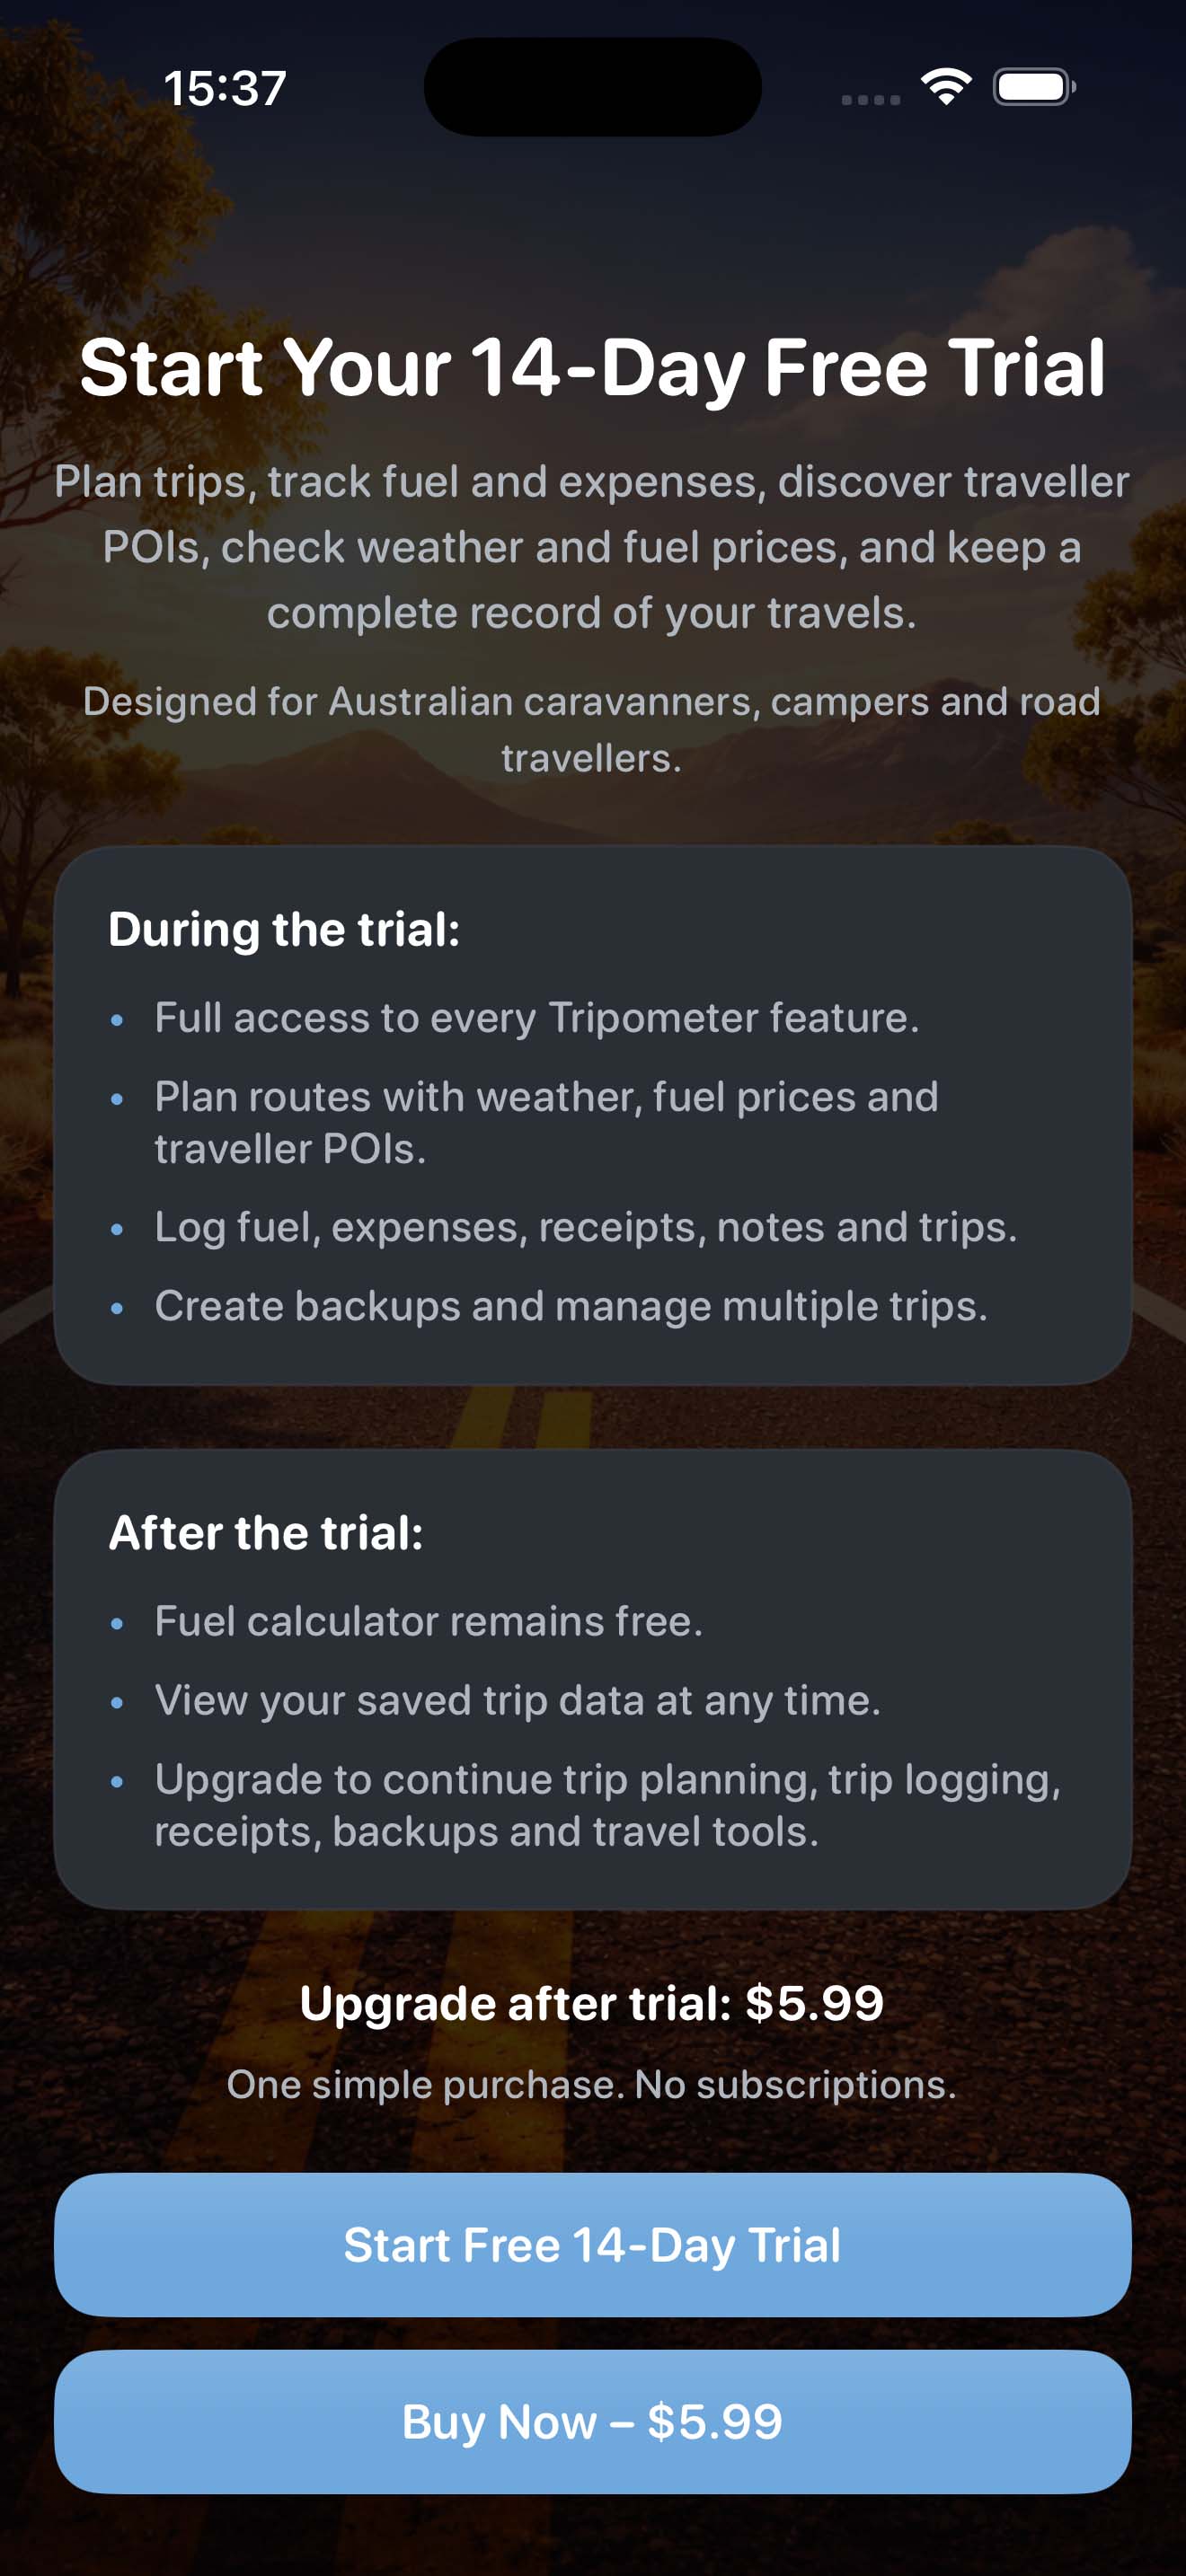
Free Trial and Upgrade
Tripometer includes a 14 day free trial so you can try the app while planning or recording a real trip.
After the trial, you can unlock the full app with a one-time purchase.
The upgrade gives lifetime access on the supported account, with no ongoing subscription.